The Aliens Legacy http://www.forum.alienslegacy.com/ |
|
Finally salving my obsession... http://www.forum.alienslegacy.com/viewtopic.php?f=3&t=9855 |
Page 1 of 2 |
Author: | tacblue [ Tue Apr 19, 2011 12:37 am ] |
Post subject: | Finally salving my obsession... |
Well, I finally have something that might be worthwhile contributing. Since 1986, I've been pining after a set of Colonial Marine armor. Close to oh, I'd guess maybe 12 or 13 years ago, I tried out a Golden Armor set. Got rid of that pretty much right off the bat, and a year or two later managed to get ahold of a Riddell set of fiberglass Dietrich stunt armor. Much, much better. Wore it a few times to costume parties and whatnot. For the time being, I'm happy. Then I start getting the itch to have a Colonial Marine airsoft loadout. Hmmm... Riddell set too fragile. Upgraded to SPAT helmet. Happy with the steel and strength of materials, but not so much with some of the innaccuracies. Upgraded to SPAT's newer lobster plates. Much better, but still... Need new front plate, new mic... Hmmm... What to do? Armor still too fragile. Consider creating an outer layer of thermo-formed polymer. Probable loss of detail. Idea scratched. Consider hand-hammering one out of aluminum. Insufficient technical expertise, lack of equipment. Idea scratched. Hear rumors of airsoft capable armor coming from MAA. Product in limbo indefinitely. Idea scratched. Reconsider SPAT armor. Possibly not strong enough for heavy-duty use. Idea scratched. Consider metal coating Riddell armor. Informed coated items will only be as strong as the substrate. Idea scratched. Frustrations deepen. And then... 
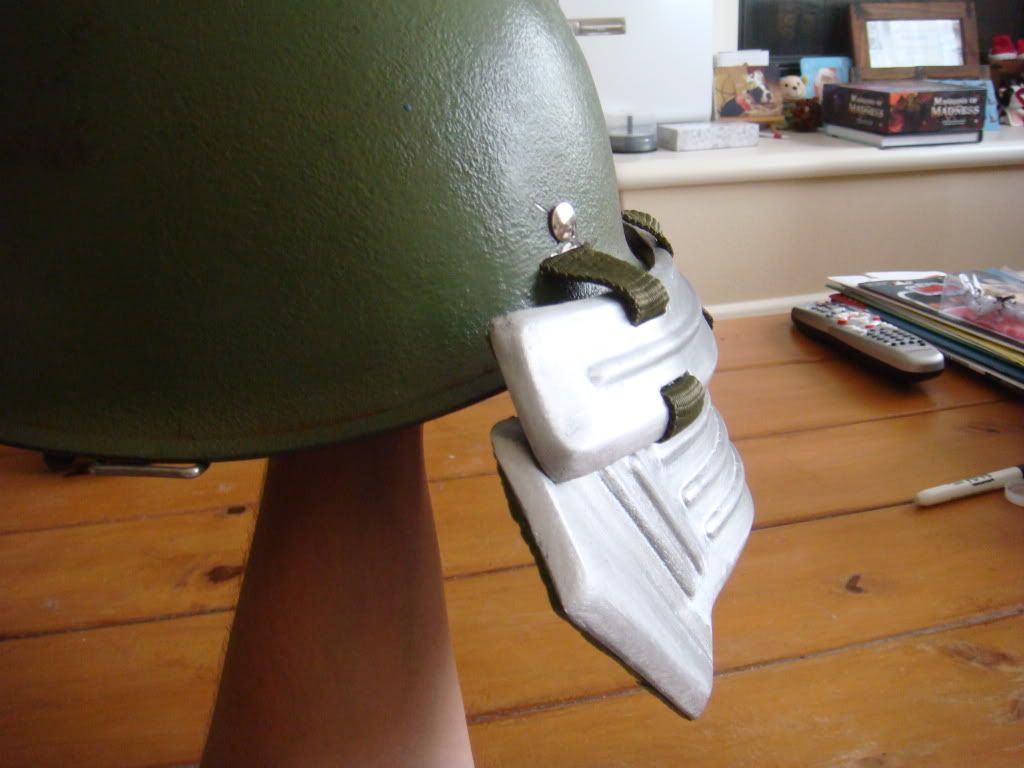
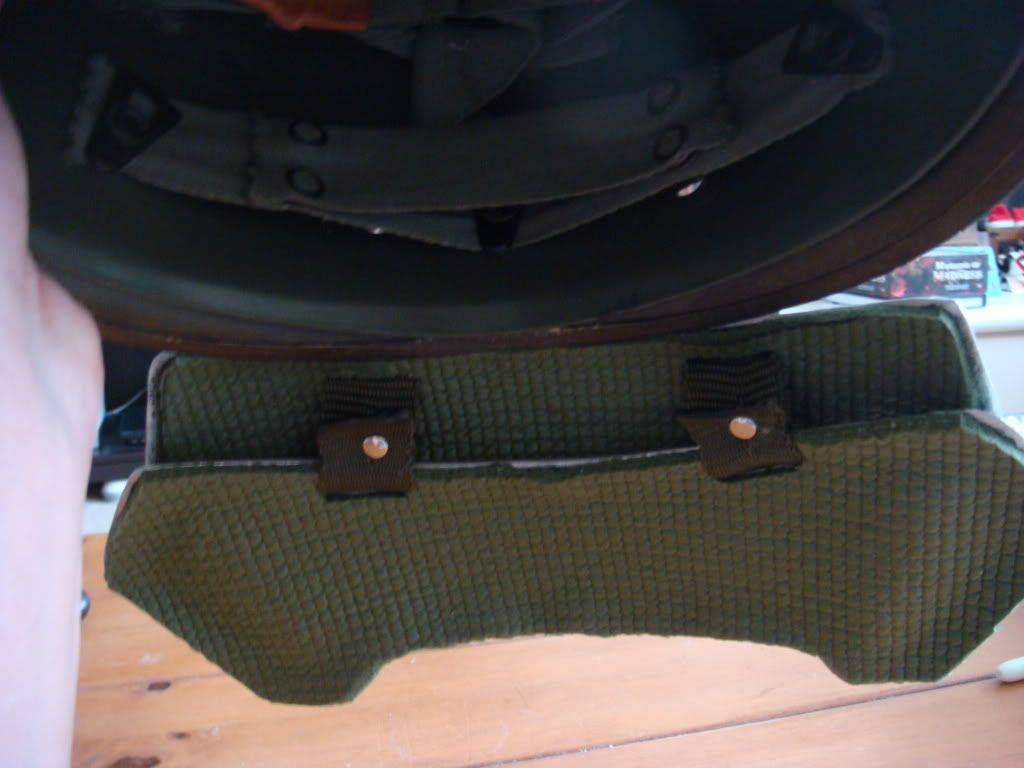
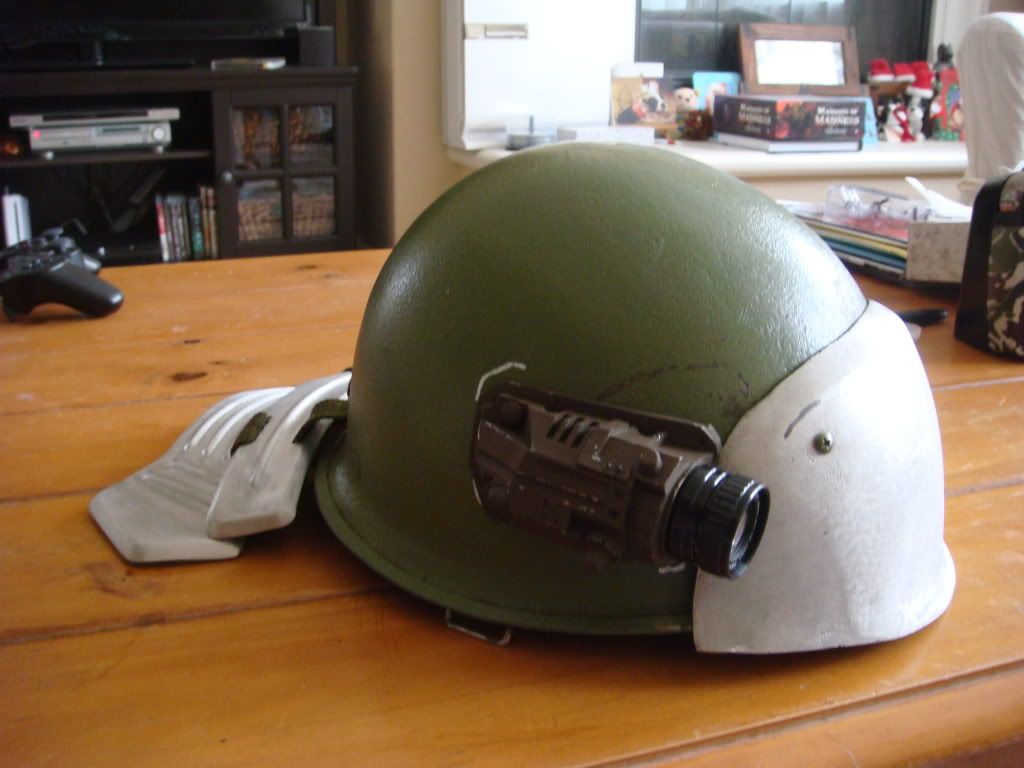
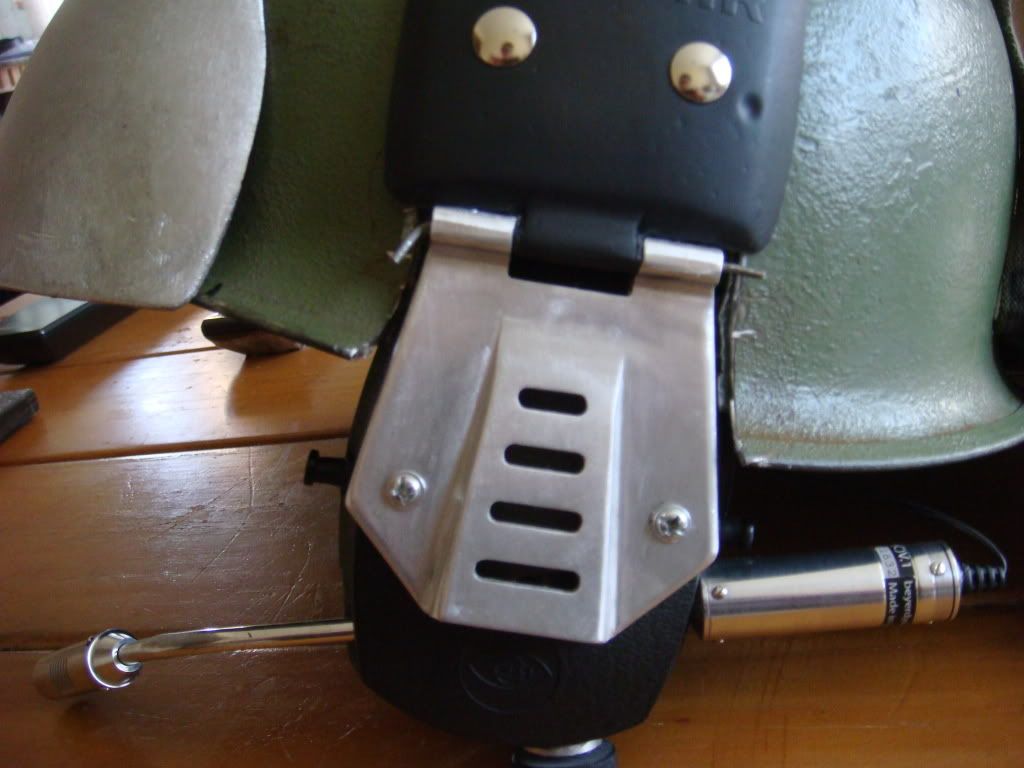
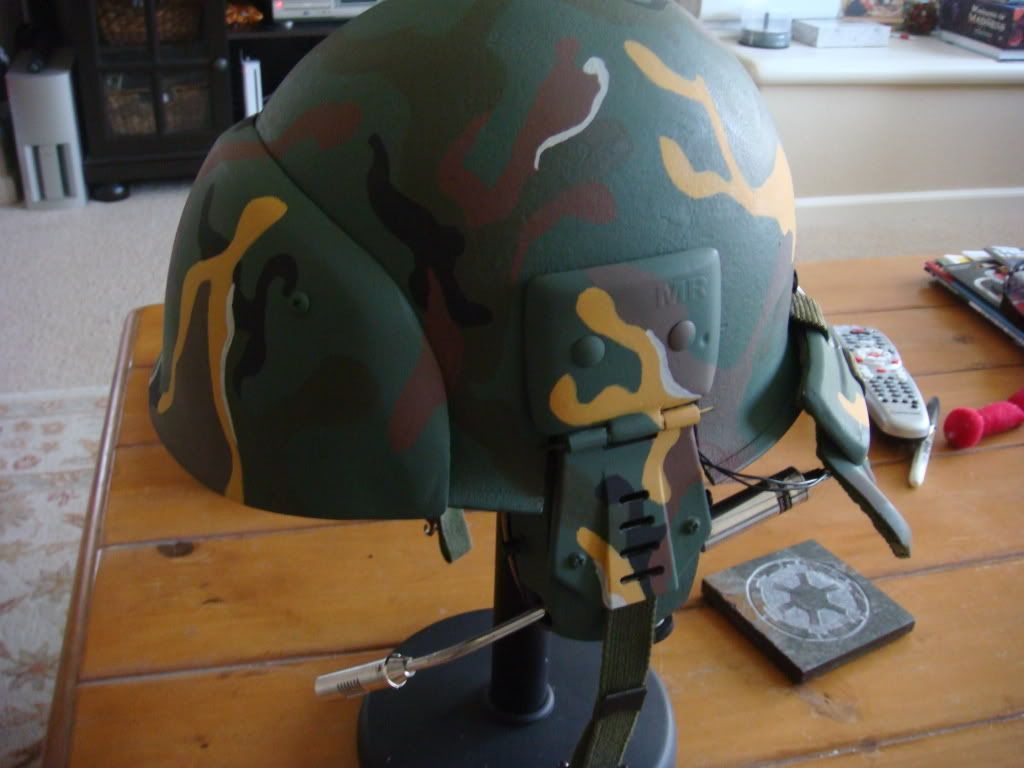
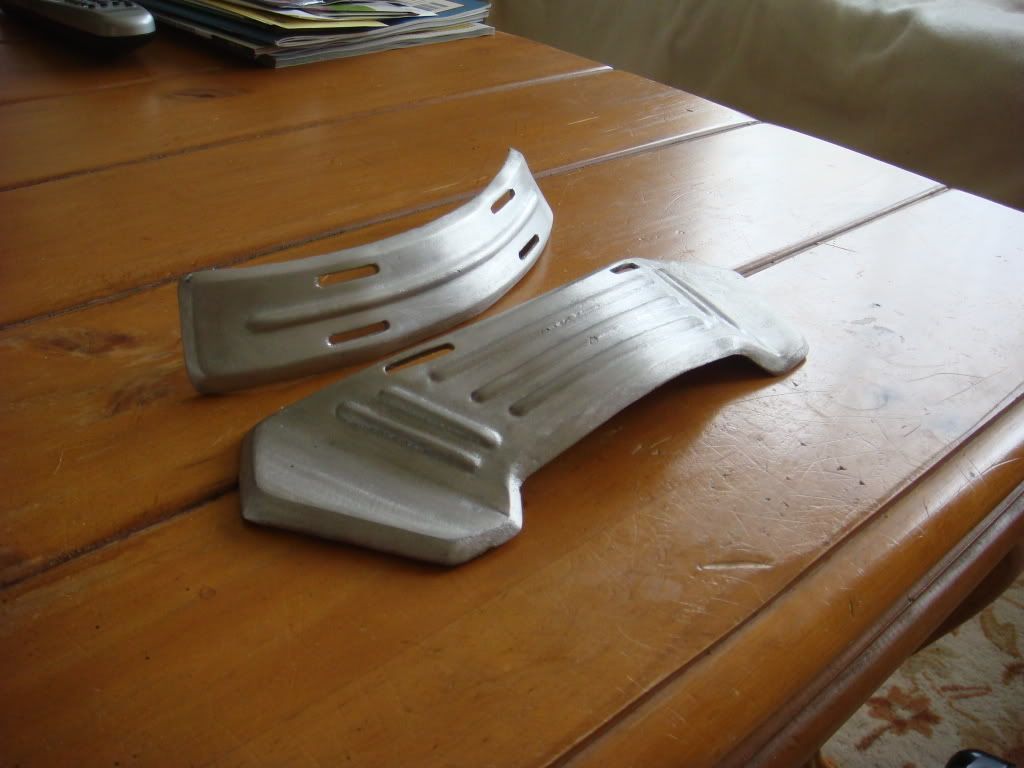
Why not simply cast my fiberglass suit in aluminum? After much searching, I finally located a metal guy locally willing to take on small scale projects. My first step was getting ahold of a front plate and lobster plate set from a member on the RPF. Turning these over to my metal guy, I got a lovely set of cast aluminum plates in return. They are very lightweight, and quite strong. Here is what they look like after cleanup, with the front plate mounted to my steel pot: ![]() ![]() ![]() I have decided to chronicle my project here, so that I can share the fulfilment of an obsession of mine that has been afflicting me since '86 when I saw Aliens in the the theatre with others who might be similarly afflicted. 
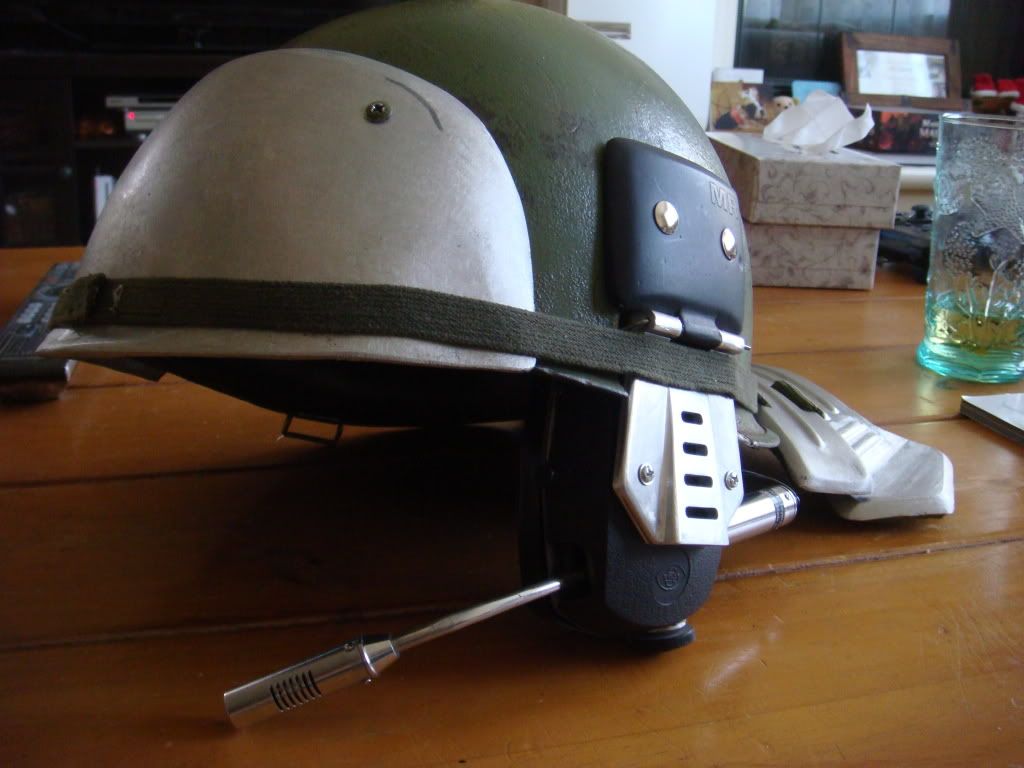
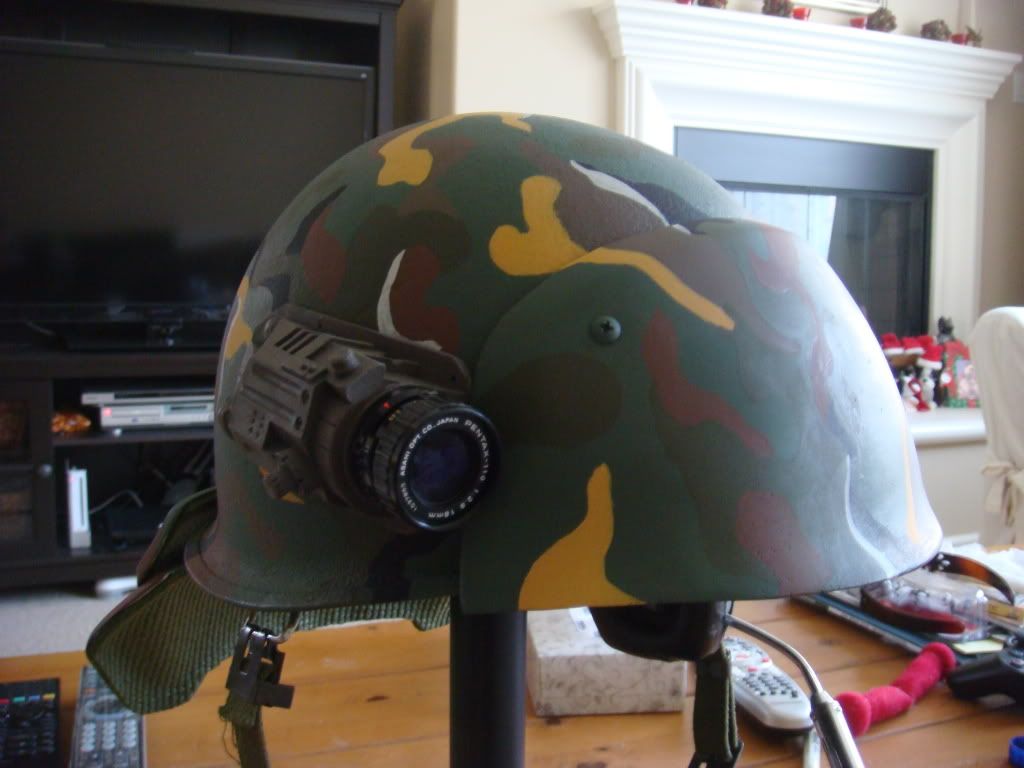
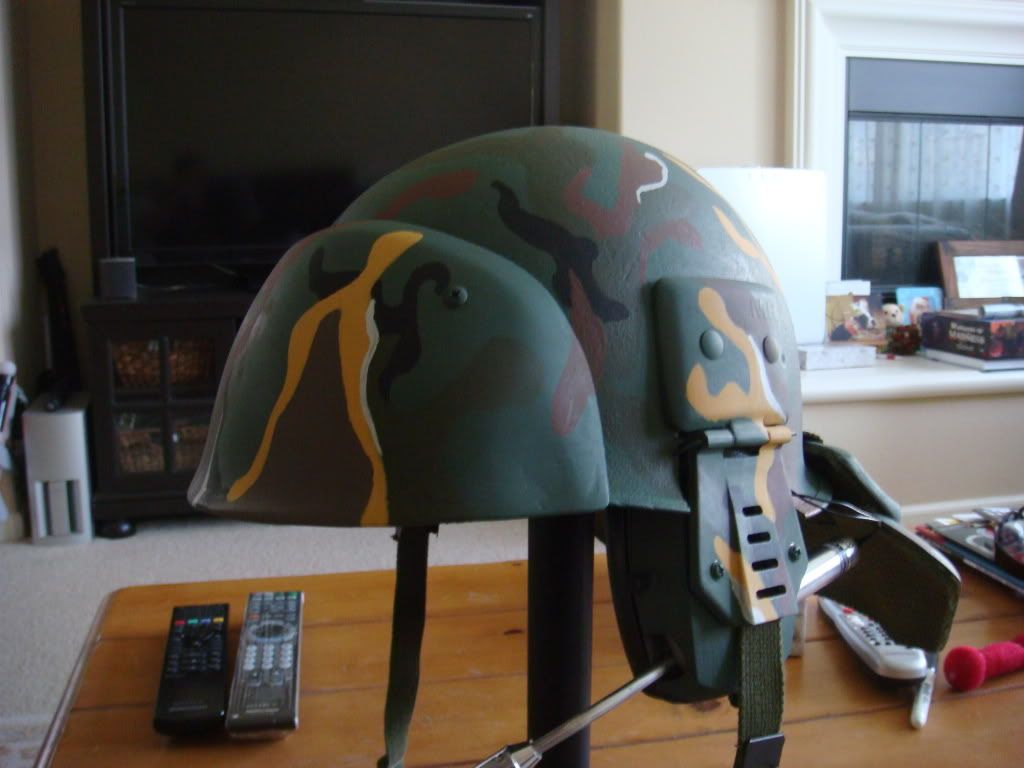
My metal guy now has one of the greaves to work on now. I'll be pieceing this together bit by bit as I can afford to. I also have a pulse rifle build going on concurrent to this project, wherein I am completely overhauling my G&P kit (perhaps getting rid of it might be more accurate) with HCG shrouds, a SPAS cage Maruzen combo, and other Phil S. parts. Also already enroute is a working mic and earpiece setup courtesy of a member in a Land Down Under. I expect the helmet ought to be done soon! I hope this thread will be of some interest to you all. |
Author: | Harry Harris [ Tue Apr 19, 2011 12:44 am ] |
Post subject: | Re: Finally salving my obsession... |
Wait so you're saying those pieces are cast in SOLID aluminium?! Harry |
Author: | tacblue [ Tue Apr 19, 2011 1:11 am ] |
Post subject: | Re: Finally salving my obsession... |
Yes Mr.Harris. Nothing else quite fit the bill, and unfortunately not being able to afford a genuine TE suit from the man himself, I figured the next best thing was to have my whole suit cast in aluminum. That way I'll be able to wear it hard, but be much less likely to break parts or have the explosive shattering effect I'd likely get if I tried to play in my fiberglass set. Plus, it's probably as close as I'll ever get to screen accurate... Until I win Lotto, anyway! ![]() |
Author: | Harry Harris [ Tue Apr 19, 2011 1:18 am ] |
Post subject: | Re: Finally salving my obsession... |
Wow! I'm pretty surprised that having it cast in aluminium will be cheaper than a TE set though. Looking forward to your updates! Harry |
Author: | stephen210 [ Tue Apr 19, 2011 1:34 am ] |
Post subject: | Re: Finally salving my obsession... |
lookin Good! |
Author: | Noble [ Tue Apr 19, 2011 1:43 am ] |
Post subject: | Re: Finally salving my obsession... |
You are talking sand casting? |
Author: | Akir [ Tue Apr 19, 2011 1:45 am ] |
Post subject: | Re: Finally salving my obsession... |
Looming good. But as harry said, is it really cheaper than a TE set? |
Author: | venturasulaco [ Tue Apr 19, 2011 2:54 am ] |
Post subject: | Re: Finally salving my obsession... |
Im in the process of having mr. English so a set for me and while I'm not going to say it's not an insignificant bit of money, it's not as outrageous as you think. If you are paying for this worker's materials and labor, seems like it would be worth an email to the man himself |
Author: | Winch [ Tue Apr 19, 2011 8:51 am ] |
Post subject: | Re: Finally salving my obsession... |
Well Noble beat me to it suggesting that these are Sand Cast and if the guy is already setup to do it then the costs of small parts like the lobster plates will not be that great! Material cost + Labour cost + Fuel/Energy cost (not inconsiderable to melt even a small amount of aluminium ![]() Now if we were talking die casting even gravity die casting never mind pressure die casting then you would be talking in the tens of thousands, at the very least, for the equipment and moulds before you even melted any aluminium. ![]() I did a little hands on sand casting at school as part of my metalwork course and some years later had to research and give a presentation to class on the same subject when studying engineering. Another possibility depending on what exactly the masters were made of is a variation on lost wax casting in which the master is coated with a liquid ceramic slurry which then hardens to form a rigid shell mould into which molten metal is then poured and vapourises the original master (whether this would work with resin would depend on the resin at a guess). The main drawback with this method is that it destroys the master however in the normal application it is not a problem since it is intended as such and the wax masters are themselves cast in a special negative master die. I suggest this as a possibility since tacblue doesn't mention getting his masters back but rather "getting the aluminium plates in exchange". In short these babies look good and are lightweight and certainly won't be damaged easily! As to whether larger items like the greaves and the cuirass will be suitable for casting I must confess to having my doubts. Although other small parts like the Ab Pad plates and shoulder arches and "bells" should be OK. |
Author: | Dropshipbob [ Tue Apr 19, 2011 3:37 pm ] |
Post subject: | Re: Finally salving my obsession... |
Cast aluminum.....nice! |
Author: | PVB [ Tue Apr 19, 2011 5:52 pm ] |
Post subject: | Re: Finally salving my obsession... |
Harry Harris wrote: Wow! I'm pretty surprised that having it cast in aluminium will be cheaper than a TE set though. Looking forward to your updates! Harry Wouldn't tacblue have to fly over for at least one test fitting of the TE armour though? |
Author: | tacblue [ Tue Apr 19, 2011 6:53 pm ] |
Post subject: | Re: Finally salving my obsession... |
Not to mention the poor pound/dollar exchange rate! Yes, they are sand cast, and he has already looked over the entire set with an eye towards whether it is feasible or not. This is a local guy who takes on small projects that larger foundries don't want to do. He specializes in custom bits. From our inital going over and rough estimate, this ought to run me around a third of what the last TE prices I'd heard were. Not sure what they are now, but I can fairly guarantee they won't be this low. And that's before figuring in shipping. And more to the point, IF I were to get a set by the Man himself, I'm not sure I'd want to put it through the rigors of gaming, crawling through the mud and rocks, banging into walls, etc... That would seem almost sacrilegious in a way! This I won't mind banging up, plus I get free life time repairs and or alterations as needed! Hard to beat that! Now, having obtained permission to post his user name from the RPF member that I got the fiberglass plates from originally, I'd like to give due credit to Stephen210 for the beautiful set of plates that I used as the patterns for these plates. The originals were fantastic and pretty much flawless, and translated pretty well into metal. I will eventually get the patterns back, but at the moment we are tweaking them a bit more in order to improve the fit of the front plate, as it had to be thickened a bit before casting. As it is, it still has to be bent into shape once situated on the helmet. As for progress, on the menu for today is drilling out a hole in the helmet to mount the camera, as well as cutting the slots for the webbing. <sigh> Why can't I have some sort of superlaser that would cut right through that thing?! That's not too much to ask, is it? |
Author: | PVB [ Tue Apr 19, 2011 8:57 pm ] |
Post subject: | Re: Finally salving my obsession... |
How thick is the ali on those plates? Maybe a pic of a lobster plate on edge to show it clearer, as it looks pretty thin in the webbing slots? ![]() stephen210 is a member on here too and I agree he's great. ![]() |
Author: | Akir [ Tue Apr 19, 2011 11:41 pm ] |
Post subject: | Re: Finally salving my obsession... |
As a side note I take it the TE armour prices are not to be spoken of publicly? |
Author: | tacblue [ Wed Apr 20, 2011 4:04 am ] |
Post subject: | Re: Finally salving my obsession... |
PVB, I've already glued in some padding into the lobster plates during my construction time today, so regrettably I can't take a pic as you descirbed. However, going off the front plate, which in most areas was close to the same as the lobster plates, I've measured between 3 and 5 mm thick. They may look thin, but they are quite substantial as far as strength goes. It took quite a bit of elbow grease to bend the edges of the front plate in a bit when I was fitting it to the helmet. The lobster plates, the metal guy actually showed me the strength of the piece by slamming it down on the work table hard, and there was no deformation or warping. I figure it's strong enough for my purposes! There is basically no flex in the pieces, if that's what you're asking. So, today's progress: Got the lobster plates padded and attached to the helmet, as well as the helmet camera. Not the neatest job on the padding, granted, but it will suffice for now. I find it gives that certain sort of realistic prop ambience, rather like my assymetrical Stormtrooper helmet, plus it's not really obvious when it's being worn. Just using an OD yoga mat until something better comes along. The webbing is leftovers from my Riddell suit. The studs holding the straps into the helmet are from Tandy Leather. Yes, I thought about using a smaller two part rivet, but ended up using these as they screw together, thus making the neck assembly removable. I decided to forego a tiny bit of accuracy in favor of convenience in this case. Helmet cam is from my SPAT helmet, with the obvious Pentax lens upgrade. Simply held on by a screw. All parts are screwed through the liner to secure it in place (not to mention from the interior shots of Frost's helmet that looks like what was done). ![]() ![]() ![]() ![]() ![]() Question for you Mr.Harris: If you happen to recall, does any of your screen-used armour show evidence of being primered prior to painting with the Humbrols? Once my comms setup arrives, I'm itching to start painting... I never bothered priming my Riddell set, just scrubbed it with a Brillo pad, as was conventional wisdom at the time... |
Author: | Harry Harris [ Wed Apr 20, 2011 9:47 am ] |
Post subject: | Re: Finally salving my obsession... |
tacblue wrote: Question for you Mr.Harris: If you happen to recall, does any of your screen-used armour show evidence of being primered prior to painting with the Humbrols? No, it looks like it was just hit straight with the first coat of Humbrol. Bare (and clean) aluminium would take the enamel paint really well so there was probably no need - also I know that Terry and his team were up against it in terms of time so that was a likely factor in missing out the undercoat stage. Hope that helps, Harry |
Author: | Padsbrat [ Wed Apr 20, 2011 12:42 pm ] |
Post subject: | Re: Finally salving my obsession... |
Besides, the paints should be allowed the chip and wear away revealing the metal underneath. It gives the armour a well used look. |
Author: | punkmarine [ Wed Apr 20, 2011 1:15 pm ] |
Post subject: | Re: Finally salving my obsession... |
Looking great. ![]() Personally I wouldn't rivet through the liner, as it is nice to be able to remove it easily if needed. for example, it will need to be removed if you want to fit an helmet cover. |
Author: | tacblue [ Wed Apr 20, 2011 8:21 pm ] |
Post subject: | Re: Finally salving my obsession... |
Thank you for the info Mr.Harris, I figured as much, but wanted to be sure. Today is Monday for my work week, so I won't be able to get back into it until next Monday when I go back on watch off. <sigh> Going to be driving me up the wall not being able to any work on it! ![]() Punkmarine- I didn't rivet anything through the liner, it's all screwed through, so is completely removable. I've got a couple of helmet covers coming from MAA (in theory anyway), so I wanted to be able to take it apart. Plus I wanted it dismantleable (is that a word?) in case I end up damaging sections, though it's hard to imagine doing so. As it is, I think I need to enlarge the helmet camera screw hole and move it back a few millimeters to give a little better clearance between the side of the camera lens and front plate. I suppose I could cut a little notch for it into the front plate as I've seen on some helmets, but I think I'm going to stick with the path of least resistance. At least until I get braver at cutting things. I suppose this is a good warmup to cutting my SPAS cage... |
Author: | tacblue [ Wed May 11, 2011 3:24 am ] |
Post subject: | Re: Finally salving my obsession... |
Ok, finally getting around to an update. Over the past couple of weeks, I've received my working mic and earpiece setup courtesy of the inimitable Marsattack (thanks!) and managed to get it attached with little difficulty. ![]() ![]() ![]() After going back to work for a week, then going to some training, I've started using some "use 'em or lose 'em days" that I have to burn off before the end of June. Thus, I've had a bit of extra time to do this: ![]() ![]() ![]() ![]() I have deliberately tried to keep with a greener scheme than the last couple of helmets I painted, and also used a much smaller brush for the camo. Obviously the colors are still rather garish, as I have yet to hit it with a black ink wash. But that's what I get for using the Humbrol line. The helmet cam was a neat experiment for me however, as I used a latex paint from Lowe's that I had computer matched to a small sample of some remaining Bess Brown I had. Oddly, after quite some time the color seems to have changed to a more purple-ish tint, quite different from the brown that my other helmet cam turned out from years ago. The only thing remaining I guess is to download the armor font and make a stencil for my name. That and finding a proper helmet band for the thing. If anyone can help out, I'd be grateful. Not looking for the cat's eye bands, those are easy enough to come by. I mean the wider "accurate" band... Besides cutting up my SPAS cage, next up my metal guy has one set of my greaves to work on. We'll see how it turns out! |
Author: | JP05 [ Wed May 11, 2011 11:47 pm ] |
Post subject: | Re: Finally salving my obsession... |
Harry Harris wrote: tacblue wrote: Question for you Mr.Harris: If you happen to recall, does any of your screen-used armour show evidence of being primered prior to painting with the Humbrols? No, it looks like it was just hit straight with the first coat of Humbrol. Bare (and clean) aluminium would take the enamel paint really well so there was probably no need - also I know that Terry and his team were up against it in terms of time so that was a likely factor in missing out the undercoat stage. Hope that helps, Harry When Terry painted my set of armor....he just painted it right onto the aluminum. On the phone he said this is how he did the originals. Interestingly enough.....when he built my set, he painted the cammo pattern first, then filled in with the base green, adding the grey patterns at the end. More info here on the armor he built me: [url]http://www.themppc.com/magpress/the-mppc’s-steve-radler-becomes-hudson-from-aliens/[/url] Steve |
Author: | tacblue [ Thu May 12, 2011 2:25 am ] |
Post subject: | Re: Finally salving my obsession... |
Very interesting tidbit on the order of application for the camo. Perhaps it's to save on the green paint, as I found that other than the matt sand, the green is the one paint that requires several coats to get a good even finish with. Although that may be attributable to the fact that the green acted as a basecoat for the other colors... Hmmm... Or possibly it's so that the paint will wear away evenly across all the colors as it gets banged up, so that metal shows under the brown, grey, etc rather than a green basecoat while the green would just wear right to the metal. Definitely food for thought anyway... |
Author: | tacblue [ Tue Apr 05, 2016 8:15 am ] | ||
Post subject: | |||
So.. apparently I added the wrong comparison picture. So that one was courtesy of whoever took it, I apologize for not knowing who it was, but please PM me to remove it if you prefer I not use it. And to THIS post I'll attach the one I mentioned in my previous post... Hopefully... And wow... has it REALLY been like FIVE years since I made any progress on this?!
|
Author: | bigbisont [ Tue Apr 05, 2016 3:23 pm ] |
Post subject: | |
Better late than never! Looking pretty darn good. That should weather up real nice! |
Page 1 of 2 | All times are UTC [ DST ] |
Powered by phpBB © 2000, 2002, 2005, 2007 phpBB Group http://www.phpbb.com/ |